Flutter BLoC- Easiest explanation
Start implementing BLoC today - 4 mins read
Flow:
What are states and why states are important?
Why do we need BLoC?
What is BLoC?
Creating a counter app using BLoC
What are states:

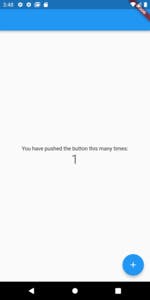
In the basic flutter sample project 'counter app', whenever the increment button is tapped, the state of the screen changes, and the number gets incremented. Basically, the screen rebuilds. In simple words, rebuilding the widget whenever there is a change in data that we want to show on the screen is called state management.
To manage states, there are many options: ChangeNotifierProvider, setState, getx.. etc.
Why states are important
The above example was for a small app. Let's say there is an app that has an API integration, we would need to show the screens accordingly. The basic states that will be required for this are:
1: Loading state (Showing circular indicator until data is fetched)
2: Loaded State (Showing data on the screen)
3: Error states/ Network failure state (When there is a problem while fetching data or network issues)
What is BLoC?
BLoC stands for Business login Components. Its aim is to separate business logic from UI
To simplify, BLoC is basically a stream that listens to an event that is trigged and emits a particular state associated with that event.
In the future, I will try to explain more in detail.

Events: In the counter application there is one event that is getting triggered, Increment. Whenever the user taps on the floating button an event gets triggered*.*
BLoC: BLoC stream listens to an event that is triggered and emits a state accordingly.
Eg: When the user taps on the increment button, BLoC listens to the event and does the increment part, and finally emits a state with the incremented value in it.
State: Whenever BLoC emits a state, the screen is built accordingly.
- We will be creating a counter app to understand how bloc works.
Note: Package used: https://pub.dev/packages/flutter_bloc
Firstly, we will be creating events and states that are required.
Creating Events: As we are doing just an increment operation, we will be creating only one event with a counter variable in it that we will be passing to the bloc
abstract class CounterEvent{}

class IncrementEvent extends CounterEvent{
  int counter;
  IncrementEvent({required this.counter});
}
Whenever the increment button will be tapped IncrementEvent will get triggered.
Creating States: The first state that BLoC uses is the initial state, we will be creating two states
1: InitialCounterState where we will create a counter variable and assign its value to 0 in BLoC
2: IncrementedCounterState: Whenever the value of the counter increases this state will be emitted with the updated value of the counter
abstract class CounterState {
  int counter;
  CounterState(this.counter);
}

class InitialCounterState extends CounterState {
  InitialCounterState(super.counter);
}

class IncrementedCounterState extends CounterState {
  IncrementedCounterState(super.counter);
}
Creating BLoC: We will be creating a bloc and assigning the counter value to 0 in the initial state.
import 'package:flutter_application_1/bloc/counter_event.dart';
import 'package:flutter_application_1/bloc/counter_state.dart';
import 'package:flutter_bloc/flutter_bloc.dart';

class CounterBloc extends Bloc<CounterEvent, CounterState> {
  CounterBloc() : super(InitialCounterState(0)) {
    on<IncrementEvent>((event, emit) {
      event.counter = event.counter + 1;
      emit(IncrementedCounterState(event.counter));
    });
  }
}
BLoCProvider:
BLoC provider in simple words is nothing but the provider that provides value. Wherever we declare bloc provider, its children will be able to use that bloc.
For this app, we will be declaring blocprovider to the parent of MaterialApp so that all the children will be able to use CounterBloc
class MyApp extends StatelessWidget {
  const MyApp({super.key});
  @override
  Widget build(BuildContext context) {
    return BlocProvider(
      create: (context) => CounterBloc(),
      child: MaterialApp(
        title: 'Flutter Demo',
        home: MyHomePage(),
      ),
    );
  }
}
BLoC Builder: To add events to bloc and access the states that are emitted by bloc we need bloc builder. We have stored the value of the counter in CounterState, using state.counter we will be able to access the counter value.
Using
BlocProvider.of<CounterBloc(context).add(IncrementEvent(counter.state.counter));
We will be adding event that bloc will listen to, and whenever that event gets triggered, it will increment the counter value and emit IncrementedState with a new counter value in it.
class MyHomePage extends StatelessWidget {
  @override
  Widget build(BuildContext context) {
    return BlocBuilder<CounterBloc, CounterState>(builder: (context, state) {
      return Scaffold(
        appBar: AppBar(),
        body: Center(
          child: Column(
            mainAxisAlignment: MainAxisAlignment.center,
            children: <Widget>[
              const Text(
                'You have pushed the button this many times:',
              ),
              Text(
                state.counter.toString(),
                style: Theme.of(context).textTheme.headline4,
              ),
            ],
          ),
        ),
        floatingActionButton: FloatingActionButton(
          onPressed: () {
            BlocProvider.of<CounterBloc>(context)
                .add(IncrementEvent(counter: state.counter));
          },
          tooltip: 'Increment',
          child: const Icon(Icons.add),
        ), // This trailing comma makes auto-formatting nicer for build methods.
      );
    });
  }
}
What you learned in the blog (what is state and state management, what is bloc, how to implement it).
